Tool Release: CB Bot
Today, I release CB Bot! CB Bot is a threat hunting and incident response web

In Part I of this series, we talked a bit about AWS fundamentals and how to leverage exposed EC2 instances and AWS metadata to do whatever you want (of course, given proper permissions 😉). In Part II of this series, we will go over the defensive side of AWS: how to protect against these potential attacks, and how to investigate if you suspect a compromise, or AWS informed you of a potential one, on your AWS infrastructure.
As I mentioned in the previous blog post, I am no AWS expert, but throughout my threat hunting activities and investigations, I've had to learn and work with it. If you are unfamiliar with certain AWS services (EC2, S3, IAM, etc.), I highly suggest you taking a look at Part I of this series for some pointers on AWS before you continue reading.
Given the backstory, we know that a malicious EC2 instance has been run in the company's AWS account. So what do we do now? To make it really simple, I've outlined high-level points on what you need to do first before you start digging into log data. These things are extremely important, as you never know what a threat actor has/hasn't done yet. Since there is a likelihood that bad guys could have deleted logs and potentially disabled logging, you would want to turn it back on again. If they are active and attempt another attack, at least this time around you'll be able to see something. I won't show you exactly how to enable these, but I will provide great resources that do show you how to do it. These are the two (2) things you need to enable.
From a forensic analysis standpoint, I'll highlight the things you would want to look at first before we dive into the details of some of them. Here are the six (6) things that you would want to start digging into when it's time for an investigation:
These won't cover every possible AWS compromise scenario, but it should be more than enough to get you at least started with finding evil. These are not ordered in terms of priority, so feel free to tackle each of these as you see fit. In this blog post we will be only covering bullets 1 and 4, as they would yield to a chunk of decent forensic data.
In order to figure out where to start, let's assume that Bob received an email from AWS indicating that there has been suspected malicious traffic originating from one of his instances. Given his limited AWS knowledge, he does not recognize the AWS EC2 instance ID that AWS has provided. However, as his security team, we are tasked to finding evil.
Given that we know that there has been something suspicious coming from an AWS EC2 instance, we will have to start there. First thing we need to do, is take a look at the instance that was reported. If we have the ID, we can search for it in the search bar as shown below.
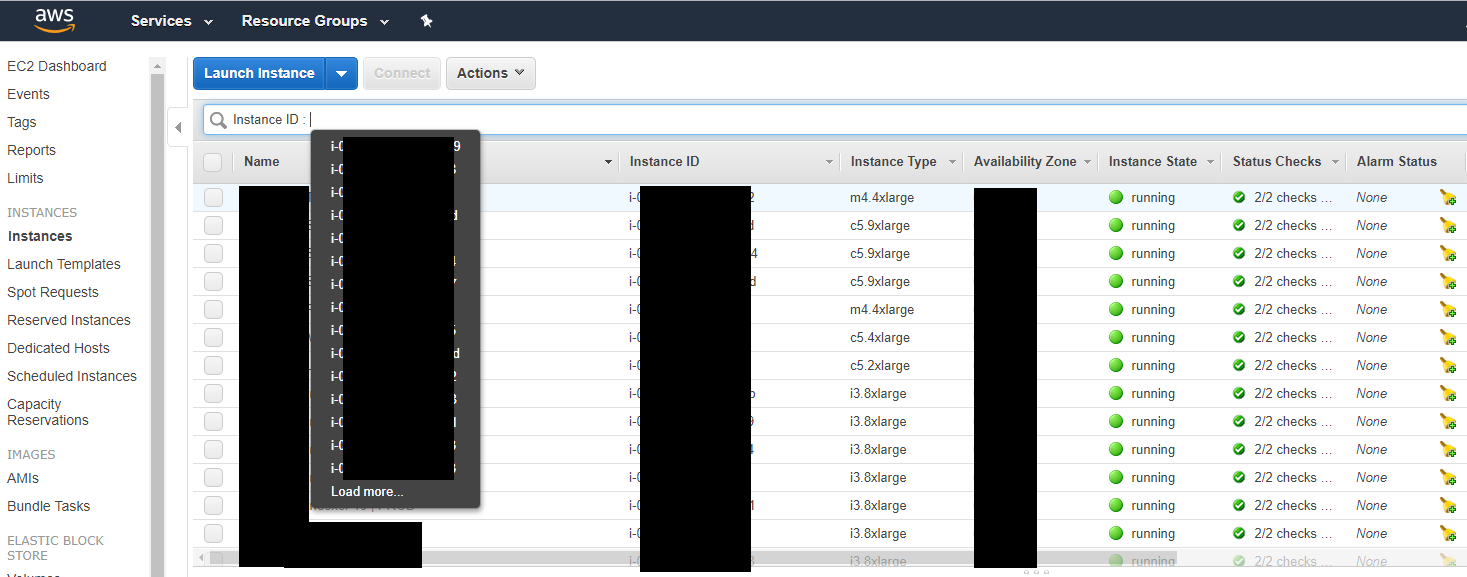
Filtering them could make it easier for you to identify which one it is, if you have a ton of instances like I do. Some other keys to pivot off of if you do not have the ID for the malicious instance are:
These can help you narrow down which ones could be malicious. Granted, it is also really important to even review the known EC2 instances that you do have as well, just to ensure that the security groups, IAM profile and keys are the correct ones and do not need any additional tweaks. Additionally, please make sure to also review each of the regions as well! EC2 instances work per region, so each region may have their own instances and their own security groups as well! So don't forget to take a look at those as well.
Once you find the responsible instance, click on it's details to identify what settings did the attacker configure the instance to have. In this scenario, we know that our bad guy created a security group and an SSH key as well. Leveraging the instance details from the malicious server, we can pivot into those individual sections on the left hand side of the page.
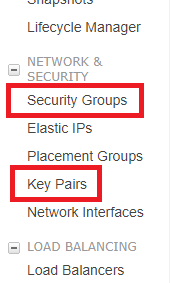
Taking a look at these two sections will clearly give us an insight if the attacker placed any additional keys or created additional security groups in the AWS account. In this case, it was only just one security group and one SSH key. The two (2) figures below show what the threat actor has done against Bob's company.
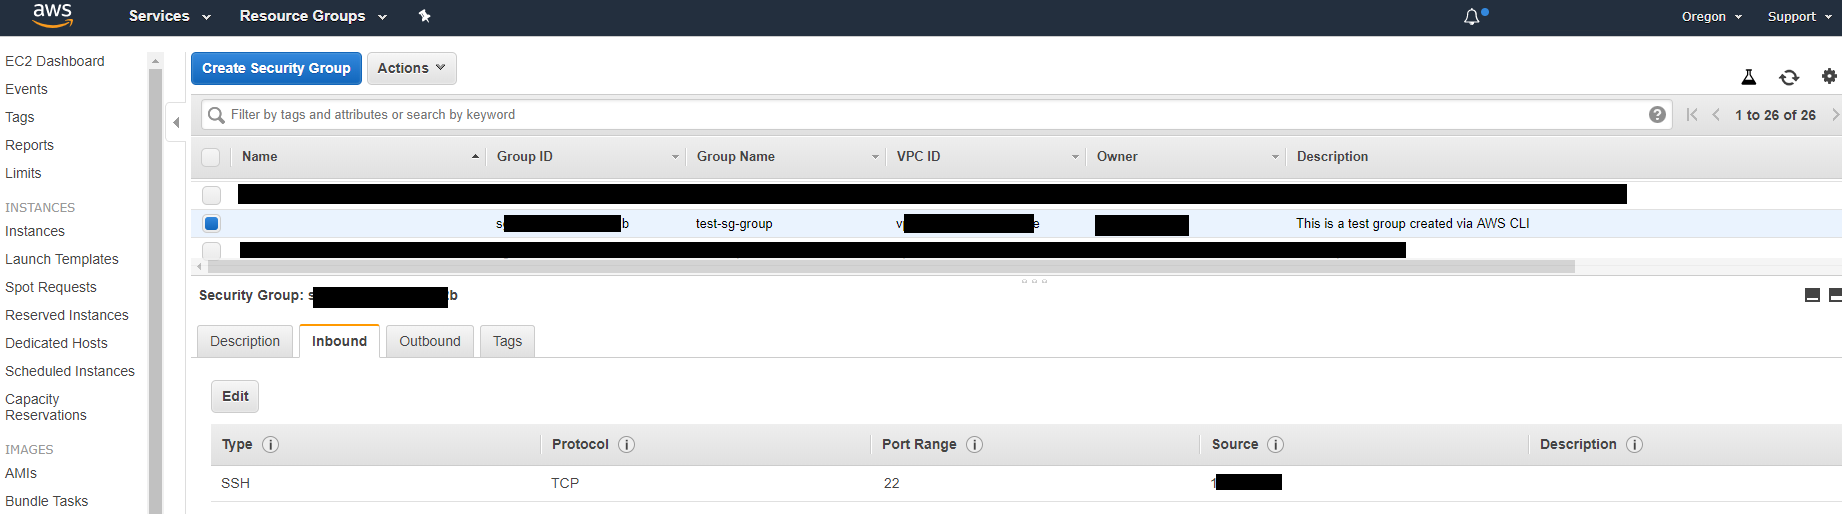
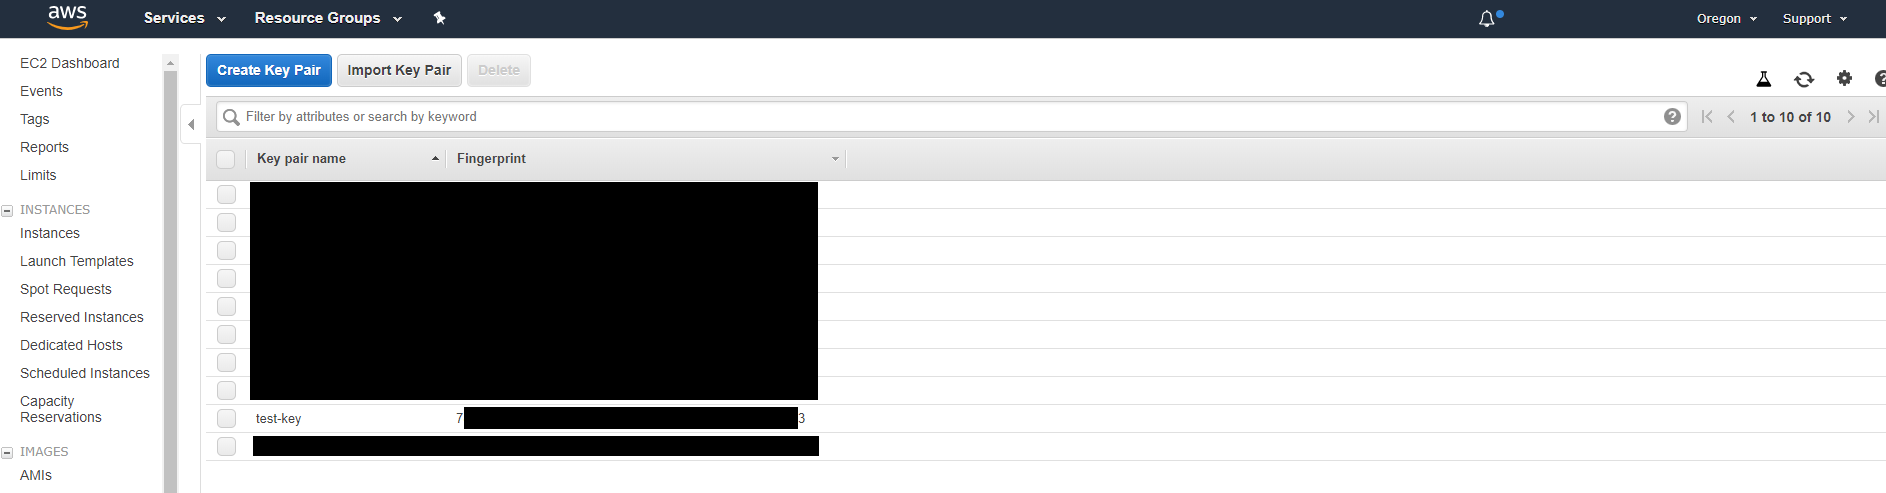
With all that data, you should have a clear story of what was done. However, I fully recommend a review on all security groups and key pairs as well to ensure that is up to date. Like the instances, please make sure to also review each of the regions as well! It's a great way to keep up with your AWS account if you don't manage it regularly.
Pro Tip: If you are as organized as I am and run 20+ instances, I recommend creating tags for all of them. That way it will make it easier to search and filter based on what you want!
Once you've collected all of the details, try to create a text file of all of the indicators that you have extracted, this will come in handy for looking at the CloudTrail logs. If you also want to dive into the forensics of the instances to determine what they did on the malicious EC2 server, create an image of it. Simply right click on the instance, then under Image > Create Image, and you should be able to create an image. Otherwise, you can also mount the volume onto your analysis server and analyze it that way. The only thing you would need to do then is head over to the Volumes section on the left hand side of the page, select the volume associated to the malicious instance, right click and select Detach Volume and then Attach Volume to your analysis server.
This is by far one of the most important log sources you could find when it comes to user activity, especially for this particular scenario that we have drawn up. In this case, we know that the threat actor managed to create an EC2 instance with its own security group and SSH keys. If you're looking for the easiest way to get a timeline of events to understand what happened, CloudTrail is your answer. Note: CloudTrail is not enabled by default, so if you have never enabled it, I highly recommend it.
Let's get started! When you head over to the CloudTrail service page within AWS, click on Event history, which is located on the left hand side of the page. You may or may not see a bunch of data on a table, however, regardless of that, what's important to note is that you can filter by all sorts of interesting things such as: AWS Access Key, Event ID, Event Source, etc.
Of course, the first thing you want to do is filter based off of the date and time of the incident. In this case, let's filter for all the activity on August 9, 2019. Now, in my case I see a ton of data that I may need to go through. However, for you all, it may be a bit lighter (i.e. depends on how many services and activities you have running).
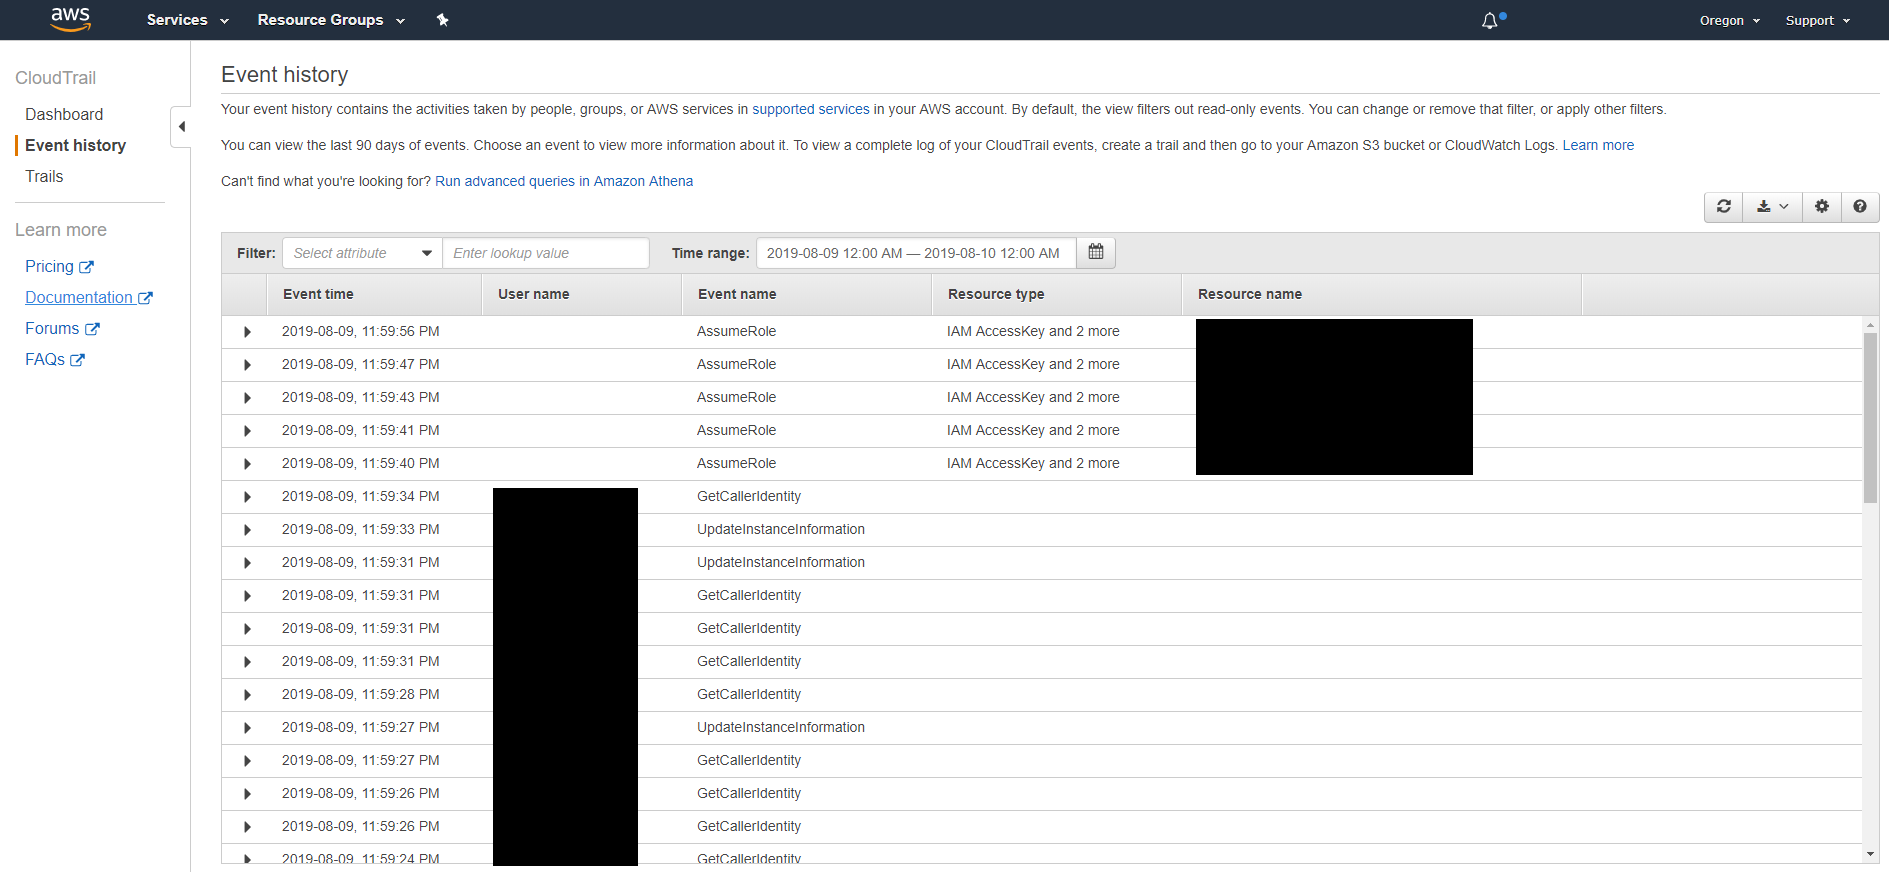
If you look at the column Event Name, it lists all of the actions/events that are done by a user or via the API. Now, let's take a step back and think about what would an attacker do. Here we know that they ran an EC2 instance. So, how about we search for that instead? In order to do so, let's filter in the search bar above. Click on the drop-down and select Event name. Next to it, let's type in the same command name that we used in Part I of this series, remove the dashes, and convert it to camel case. Therefore, run-instances would be equal to RunInstances.
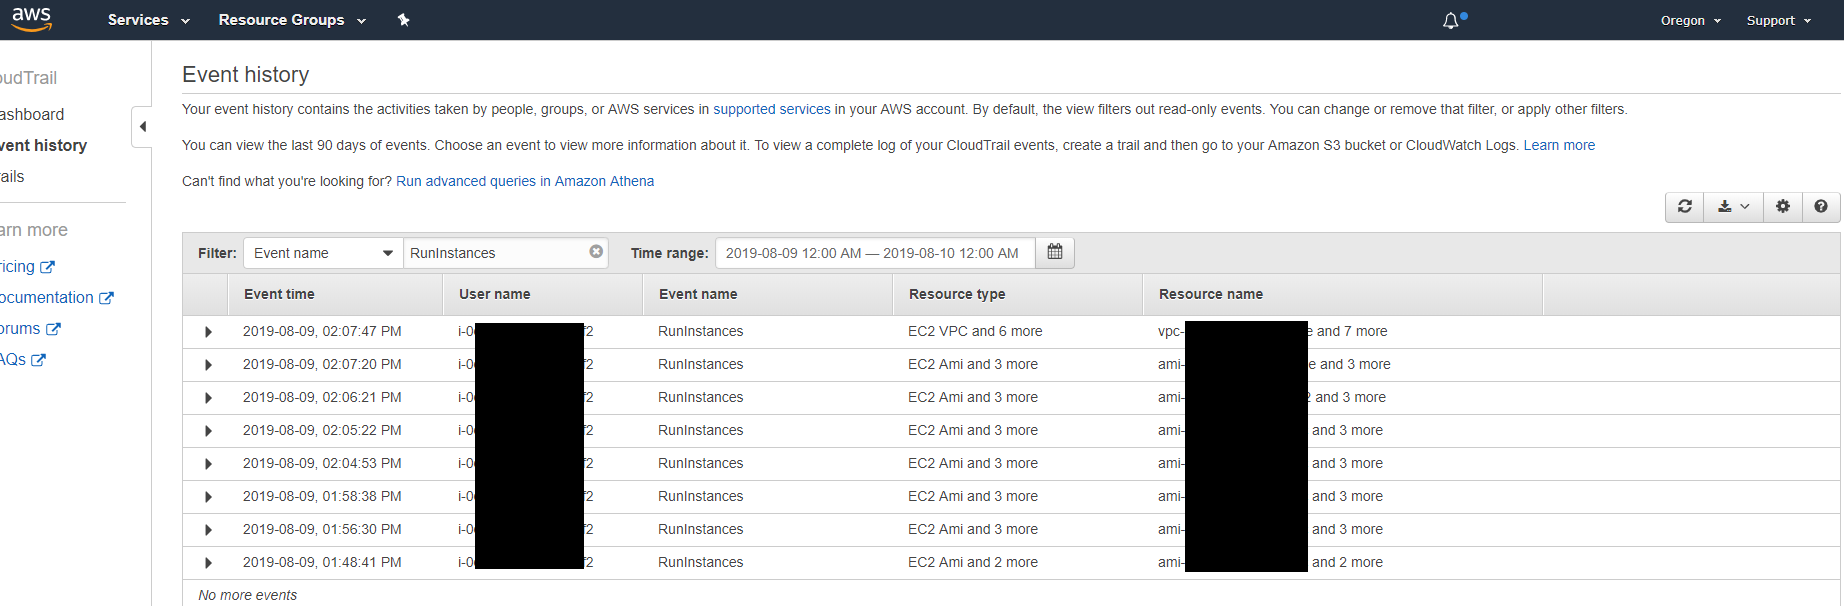
As you can tell in the User name column, we see something that looks like an instance ID. Why would an instance ID show up as a user? Well, that's because we assigned a role to our proxy server instance in Part I! So this means that any activity coming from the access keys generated for that instance, will show up as activity belonging to that EC2 instance. So how about we filter for that User name with that instance ID?
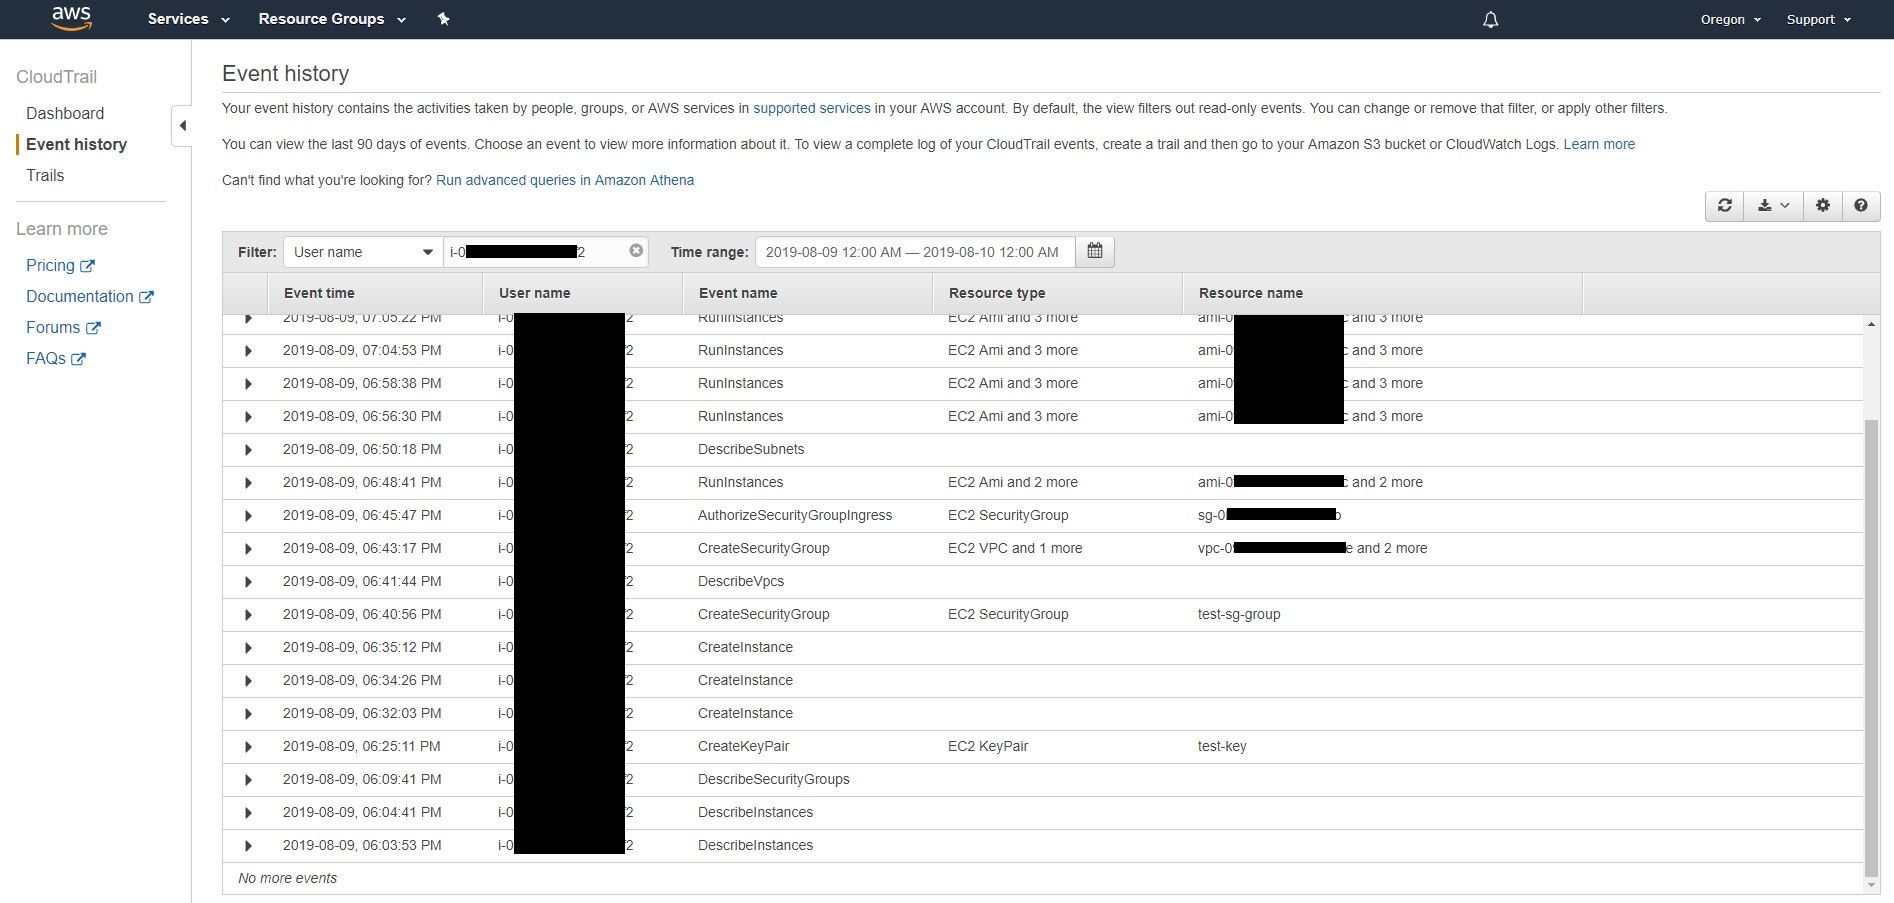
Great! We found all of the activity pertaining to that one instance. Now, if there were more activity conducted with other instances you could filter for those and even export it into a CSV format. CloudTrail logs provide a perfect timeline of what has occurred from a user and API standpoint.
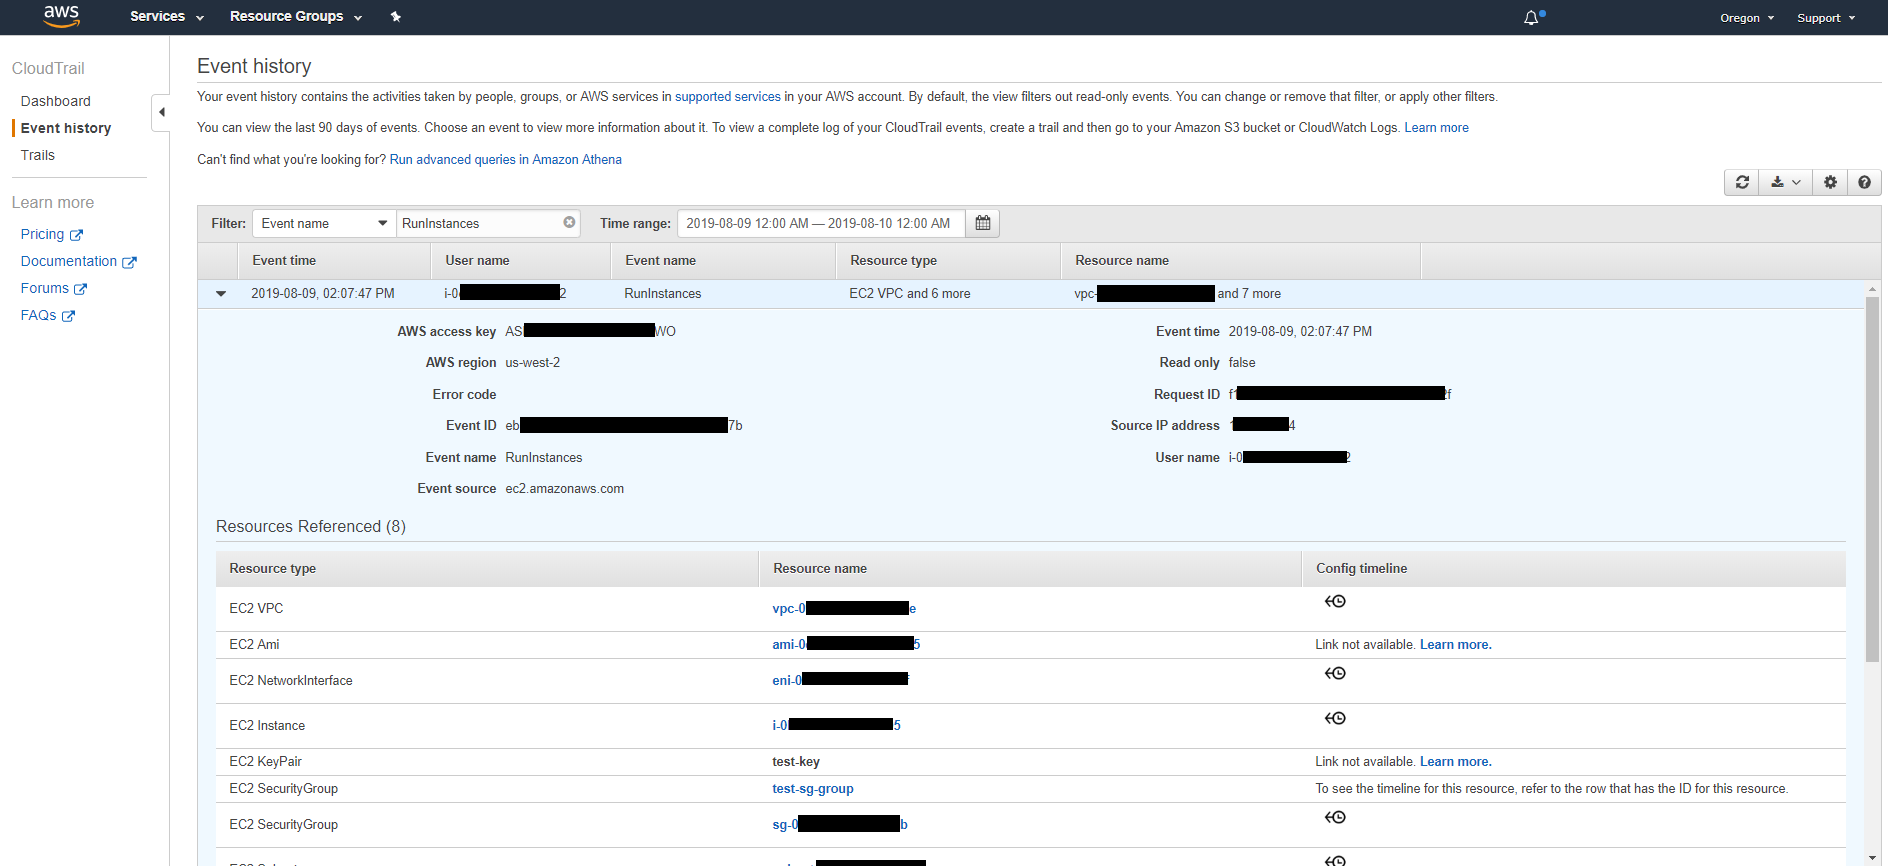
If you click each of the entries you can get to see data related to the action that was run. So in the case of running an EC2 instance, you would be able to see pretty much everything, including what AMI was used, what source IP did it originate from, what SSH key was used, etc. In fact, in Figure 6, you can see multiple run-instance attempts by the threat actor (i.e. basically me trying to figure out AWS CLI 😂). Not all of them were successful, so if you dive in on those, you can get to see what was the error. In Figure 8, we get to see that it was successful in that instance since Error Code is blank.
Remember, CloudTrail is your friend when it comes to conducting an Incident Response investigation. It will provide you with the timeline that you need if this type of incident were to happen in your environment.
All these things that we have looked at are great for when it comes to forensics, but what about threat hunting? Absolutely! You can create an AWS Lambda function that can ingest CloudTrail logs or you could simply collect them from S3 (if you're storing them there), and stack the data accordingly. You could search for specific functions that you are interested in, for example: SSH key or security group creation.
Hope you enjoyed this article. If you have any comments on specific AWS artifacts or how to make this even better, please don't hesitate to leave a comment below! We're always looking to make these blog posts entertaining and useful. 'Til next time!